I finally managed to get another game of Star Wars Armada in on Friday at my local club. My opponent is also a big fan of Armada, who consistently plays as the Rebels (which works as I prefer the Empire). He won our local Massing at Sullust, including beating me on the way in a very close game, and took the MC80 Mon Calamari cruiser as his prize.
Needless to say, I was keen for a rematch and to see Ackbar and his crew in action. In order to take down the big beast, I figured going squadron heavy against his usual A-wing screen should give me a helping hand. My opponent is a strong player who never pulls his punches in list building so I knew it would be a tough game.
(Apologies, I forgot to take any pictures of this battle - description and analysis will have to suffice!)
Fleet Lists
Empire (Me) = 394 pts
Victory-I, Grand Moff Tarkin, Expanded Hangar Bays
Victory-II, Gunnery Team, XI7 Turbolasers
Gladiator-I, Demolisher, Intel Officer, Engine Techs
Howlrunner
2 x TIE Interceptor
4 x TIE Fighter
Major Rhymer
TIE Bomber
TIE Advanced
The Rebel Scum = 399 pts
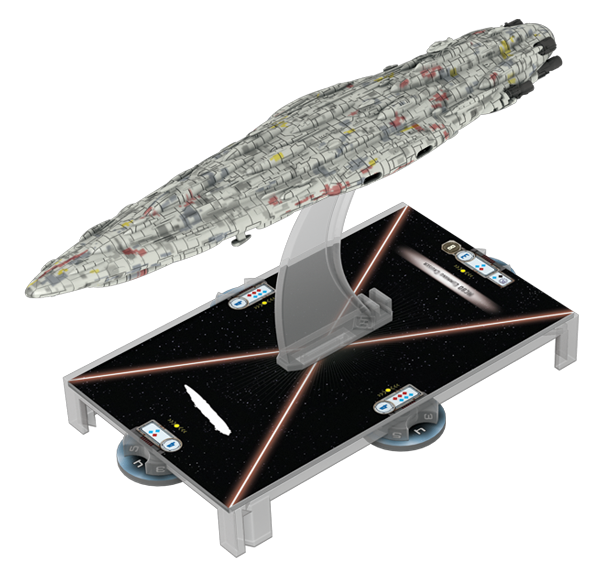
MC80 Assault Cruiser, Admiral Ackbar, Home One, Redundant Shields, Advanced Projectors
Assault Frigate Mk2-B, Gunnery Team, Enhanced Armaments
Assault Frigate Mk2-B, Gunnery Team, Enhanced Armaments
4 x A-wings
I chose to go second, with my opponent choosing from Most Wanted, Contested Outpost and Minefields. Naturally he picked the one which wouldn't require him to drive straight at me (Most Wanted).
Deployment
Before deployment, a quick word on terrain. Generally I follow the principle: place the Space Station first, then plant obstacles around it to make my opponent avoid it and corral their movement to some extent. My opponent did a really nice trick: I placed the space station, he placed asteroids blocking my route (sensible), then I returned the favour. Then he placed a large debris field on the top left corner of my deployment zone. Didn't even think about it at the time, and kept placing as usual.
When it came to deployment, I was able to see the shape of the giant conga line Ackbar had formed. Due to the debris field on the corner of my deployment zone, I couldn't place my Victorys in the usual position to squeeze my opponent between my fleet and the board edge. Well thought out! In the end I made the decision to fly to the right of the obstacle, and therefore directly into the arcs of the enemy fleet. Yeah, not a great choice...
My opponent had a conga line of AF-MC80-AF, with A-wings around the flagship. I deployed with Demolisher in the centre to draw out his deployment, then placed fighters and eventually the Victorys together on my left to try and get ahead of the Rebel fleet.
I chose the objective ships to be the respective fleet flagships, as it felt the most fluffy and I wanted to gun for the Mon Cal!
Turn 1
I advanced the fleet forwards at speed 2, banking lots of tokens. Demolisher turned left to try and navigate around my Victorys and get ahead of the enemy conga. The Rebels shuffled their conga forward at speed 2.
Turn 2
The fighters kicked off proceedings, with my opponent's A-wings attacking my TIE interceptors. The TIE fighters and Howlrunner hit back at the leading squadrons, wiping out the 2 A-wings for the loss of one interceptor.
At this point, I slowed my Victorys to avoid running too fast into Ackbar's gunline. This seemed sensible, until I realised I had completely screwed up Demolisher's flight path, who proceed to crash into the Vic-II rather than jump ahead into enemy broadside range. Doh!
Turn 3
The lead Assault Frigate popped off a few dice at the lead Vic-II. When I say a few, I mean about 7 red dice with a couple of double-hits, plus Home One bonus (free accuracy) blocking the brace giving 6 damage to the face, wiping out two whole shield facings. In one long range potshot. Wow.
This made me realise the fleet wouldn't survive more than about 2 broadsides per ship before exploding horribly. As a result, I decided to be cheeky and halt my Victorys at speed zero, a whisker out of firing range of the Rebels. Unfortunately, this meant Demolisher was stuck in the same position... so had to go to speed zero also.
At this point my entire fleet was paused out of range waiting to see what the Rebels did. Meanwhile, my fighters managed to kill off another A-wing, but devastating AAA fire wiped out several of the fragile TIEs leaving Howlrunner locked in combat alone with an A-wing on 1 health. The bomber group (Rhymer, Bomber, Advanced) popped off shots at the lead frigate... and did a total of one damage between them.
Turn 4
Things were looking bad. My fleet was stuck, the Rebels were circling around my left flank, and the small bomber group couldn't help me out. My fleet stayed out of range for another round of shooting, but the lead assault frigate moved into position for a volley on my flagship next turn. The bomber group again failed to do more than one damage between them on three black dice. Thanks for turning up guys! If I remember rightly, Howlrunner died to a counter attack from the A-wing ending in mutual destruction.
Turn 5
At this point, I had to start the fleet moving again to use my tokens and try and pick on one Rebel vessel. My flagship took a beating, losing about 5 shields from one Assault Frigate volley (blocking brace again - Home One's bonus is awesome/terrifying).
The bomber group did some damage on the lead frigate, chipping off a few more shields. Imperial firepower wasn't great as we were still at red dice range, a poor position for us. Demolisher positioned for a turn 6 attack on the lead frigate.
Turn 6
It was pretty clear that this would be the end of the line for my flagship. She survived a Home One volley, taking about 5 damage on the hull and wiping out the few repaired shields in the way. The trailing assault frigate administered the coup de grace, and Tarkin went down hard. My Vic-II took a single volley and lost a lot of (previously repaired) shields but no hull damage.
I was relying on the Demolisher and bomber group to pull back some points by taking out the lead assault frigate. Unfortunately in my excitement I had given her a Concentrate Fire order, so couldn't get up to full speed or use engine techs - meaning I had an obstructed front arc shot. One red die, which was evaded (didn't even bother with Intel Officer at this stage). The bombers took down a fair few shields, but the lead frigate didn't take a scratch on the hull.
Final Score
Empire = 4 x A-wings = 44 pts
Rebels = Victory-I (objective ship), Tarkin, Hangar Bays; Howlrunner, TIE interceptor, 4 x TIE fighter = 248 pts
Margin of Victory = 204 pts = 9-1 win to the Rebels
Post Match Analysis
Couple of thoughts on this game in particular and going into wave 2. Firsly, hats off to my opponent for the trick with setup of the obstacles and getting his deployment right. I messed this up when I already faced an uphill battle - to some extent, the conclusion was foregone once all the models had been placed. Most Wanted was the weakest of my objectives too, and he saw that. I made deployment mistakes and some horrible navigation decision which left my fleet stranded - don't plan on doing that again!! I was also really underwhelmed by Imperial anti-ship squadrons. Unlike the Rebels, they just don't have the ability to take fire and keep hitting - might stick to space superiority fighters next time.
In terms of different deployment, perhaps I should have deployed the Victorys centrally, and put Demolisher into the enemy rear. By going slow with the Vics, I could have used them to hit any ship which sought to turn and engage Demolisher. I will also take the second Gladiator next time to help that strategy!
Finally, going into wave 2 it seems clear to me now that the Victory will not see much play any more. The Empire needs to be in close to the Rebels to get the firepower edge, and for that you need speed AND smart manoeuvring. The ISD, Gladiator and Raider have speed and manoeuvrability in spades which will be needed, unlike the poor lumbering VSD. Hence perhaps why the most successful Imperial builds so far have been VGG or VGGG. Wave 2 should bring a lot more variety to that formula.

That's all for now, as we retire to the Imperial Class Star Destroyer
Avenger to lick our wounds and plan how to beat Ackbar another day!